Introducing Image Renditions In SharePoint 2013.
One of the great improvements in SharePoint 2013 is the introduction of Image Renditions. This feature allows content editors to upload images that are then automatically re-sized according to pre-defined rules for use within the website.
These re-sized images can then be used in document roll-ups and pages, reducing the page weight by downloading appropriately sized images for the content being displayed.
As you would expect, there are some pre-requisites to using Image Renditions on your SharePoint site. Firstly, you must have publishing enabled, which frankly, if you’re looking to use Image Renditions, then I would imagine you’re looking at using them in a publishing Intranet scenario (That doesn’t mean they can’t be used in a Team or Community site though!)
Secondly, you must have enabled the blob cache on your servers. Again, if you’re using SharePoint in a publishing intranet scenario, I would hope that you have already planned for caching implementation in your farm. If you haven’t, then you really should! Turning on Blob cache does have an impact on the farm, bu reducing SQL I/O, but increasing disk I/O on the web servers. (This TechNet article is currently the only one published (That I could find) that covers blob caching in SharePoint, even the Technet Image Renditions page links to this one! http://technet.microsoft.com/en-us/library/cc770229.aspx)
With that done, we can head to our Site Collection settings page and click on Image Renditions under look and feel. This takes us to the Image Renditions management page. (Note: If you have a big orange error at the top of the page, it’s possible that Blob cache hasn’t been enabled for that web application, so double check the web.config.)
You’ll see that you most likely already have some renditions configured, especially if you’ve been using the Content By Search display templates.
Click on the "Add New Item" link allows us to create a new size rendition.
Once the rendition has been defined, we can go to the Site Collection Images library and see what changes are now available in the interface.
When you click on the ellipsis icon in the picture menu, you’ll now see an Edit Renditions options. Select that to go to the Manage renditions page for the selected image.
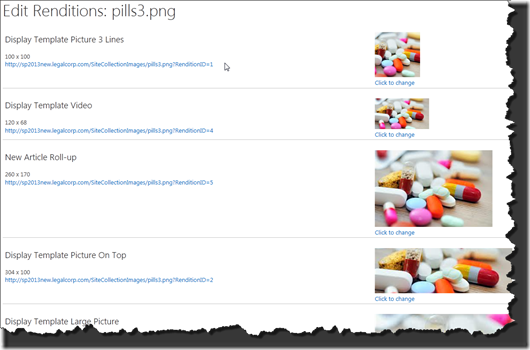
The first time you select Edit renditions for an image, it may take a short time to appear, however when it does, you’ll be presented with a preview of each rendition.
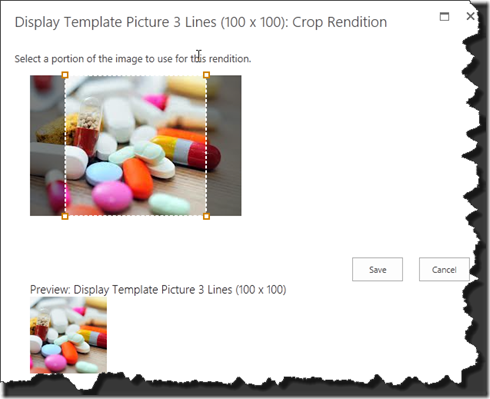
Clicking on click to change, gives you (or more importantly the content editors) the opportunity to pick which part of the picture is displayed when it needs to be cropped or re-sized.
Now you have the renditions, How do you use them? Well the first and foremost easy way is to pick them from a drop down while you’re editing your pages.
This will add your image to the page as a standard HTML img tag, with the renditionID tacked onto the end of the URL.
The second way is to just specify the width and height of the image. SharePoint will automatically pick the rendition image for you based on the width and height. If you specify just one of those values, SharePoint will apply the first matching rendition that it finds. The added advantage with this method means that it works perfectly in Content by Search or Content By Query webparts.
For further information, take a look at the MSDN documentation here:- http://msdn.microsoft.com/en-gb/library/jj720399.aspx


