One of the questions raised during my recent session at SUGUK Cambridge, was whether or not JSLink could be used to style External List Data. I certainly couldn’t see a reason why not as the External Data Column allows you to surface data within a standard SharePoint list, but I couldn’t be sure without testing.
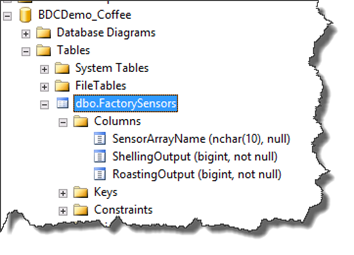
For this scenario, I’ve created a very simple database in the SQL instance connected to my Demo rig. This database contains a table named Factory Sensors, with the following columns:-
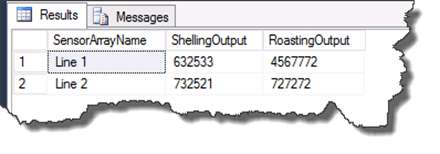
This is meant to simulate the type of real-time information you might see in an industrial application, in this case the shelling and roasting of coffee beans on an assembly line. I’ve created two rows in this database to represent the two assembly lines in our factory.
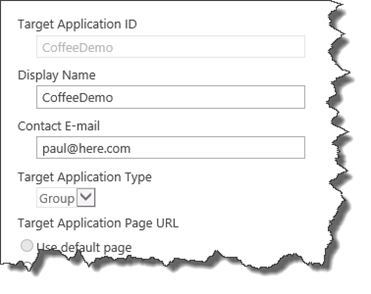
I’ve created a windows login that has read only rights to the database and created an entry in the Secure Store to allow me to connect using a Group ID.
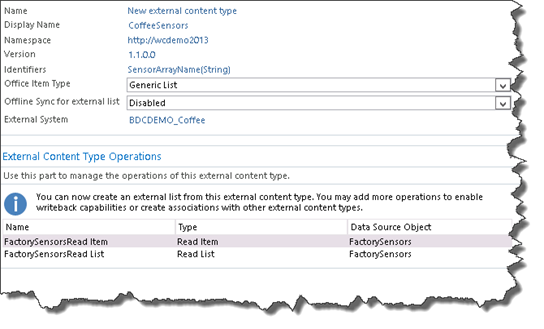
I’ve then used the Secure Store entry to create an external content type that accesses the SQL database to retrieve the data.
[important]I’m not going to go through the steps here to create an external content type in SharePoint Designer as there are lots of blog posts out there that go into some depth about it. Suffice to say, it should only take you about 5 minutes![/important]
Once the External Content type is created, we can go and start building out a list to use it. We’ll create a custom list named Coffee Sensors, with just a title field, and a single column based on the External Data field type.
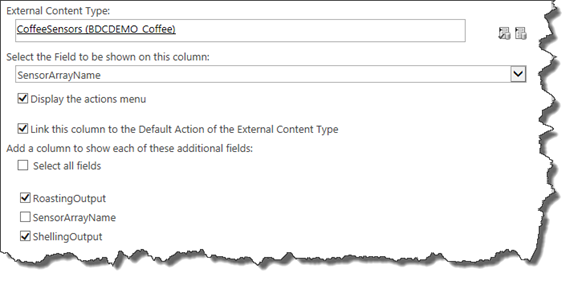
Use the External Content type picker to choose your external content type, then choose the Field to be displayed. I’ve chosen the SensorArrayName field from the database and I’ve also selected the other fields to be displayed alongside. This ensures that we can see the actual values from our sensors.
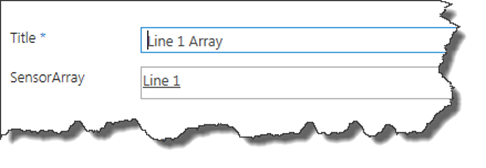
Once you click ok and return to the list, we can create two list items to represent the assembly lines from our scenario. using the BDC Picker to choose the correct database item.
With our two items created, you can now see the additional data pulled through from the database. You’ll also notice that the display names are a concatenation of the first field from the database, and then the secondary field name. This is quite important as you’ll see when we get into the display template itself.
Creating the Display Template
The actual display template for this is no different than any of the display templates that you’ve seen me create and demonstrate many times if you’ve been following my blog for sometime (The templates for which are available here in SPCSR..). The key difference is how SharePoint encodes the column names for those additional fields.
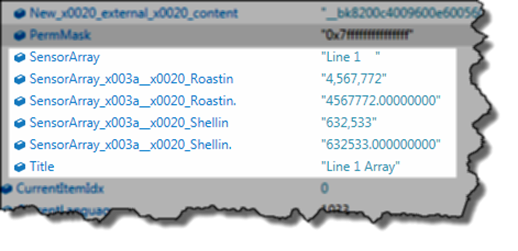
If we take a look at the context object for one of the items, you can see that the internal field names have been created as encoded versions of their display name.
The name comes from the encoding applied to “SensorArray: RoastingOutput” which thanks to the way that SharePoint encodes internal names means we only have a small portion of the actual identifier to play with. Luckily in this instance that’s enough to not create internal name pain!
You’ll also notice that there are two of them, with the first one showing a string representation of the display value, and the second displaying an actual value that can be parsed in JavaScript. these can then be used in a simple custom item rendering template to display an entry for each one.
pfh.CustomItem = function (ctx) {
     var outputString = "<div class='factoryArrayWrapper'><div class='factoryArrayName'>" + ctx.CurrentItem.Title + "</div>";
    outputString += "<div class='factorySensor'><span class='factorySensorHeader'>Roasting Output: </span><span>"
    outputString += ctx.CurrentItem.SensorArray_x003a__x0020_Roastin +"</span></div><div id='HCContainerA" + ctx.CurrentItemIdx + "' ></div>";
    outputString += "<div class='factorySensor'><span class='factorySensorHeader'>Shelling Output: </span><span>"
    outputString += ctx.CurrentItem.SensorArray_x003a__x0020_Shellin +"</span></div><div id='HCContainerB" + ctx.CurrentItemIdx + "' ></div>";
    outputString += "</div>";
    return outputString;
}
Which results in the output shown here with some very basic CSS to style it:-
Next Steps
That’s a fairly simple example of using JSLink to style data being brought into SharePoint from an external LOB system. What I’m planning to do in a future post is to use High Charts to then surface this data in the form of a gauge. The idea is to present this data in a much more visually appealing form that can immediately tell a story about the state of the assembly line to someone looking quickly at the screen.
Paul.

