A member of my team recently came across an interesting customer requirement that didn’t seem to have an easy solution using the out of the box Approvals process in Power Automate. The process on the surface seemed fairly simple, but the execution certainly proved less so!
Picture the following approval process:
- User submits a Document request in a SharePoint library and selects the first approver.
- An approval task is created and passed to the First approver.
- The First approver decides to either Reject or Approve the document and then chooses the second stage approver.
- A new approval task is created for the second stage approver.
- The Second stage Approves or rejects the document
- Document status is updated in SharePoint.
On the face of it, it’s a fairly straight forward requirement, however in an Approve action we can only capture the Outcome and Comments from the first approver, so there’s no easy way to capture a selection of the next approver (Or any other information for that matter).
The easiest resolution for this is actually to look at using Outlook Actionable messages with Adaptive cards, which would allow us to capture additional information. The only downside to this is that we would need to handle the Adaptive Card response via an HTTPS Flow trigger, which is a Premium connector! In this environment, the client doesn’t have access to Premium Connectors which rules out that option.
Dynamic second stage approvals without premium connectors?
The work around that I suggested, does require that the list of approvers for the second stage be available at the point that the workflow is triggered. For this solution we decided that using a SharePoint configuration list provided the functionality that we needed and would meet the business requirements that we captured. The approval process becomes:
- User submits a completed Document request in a SharePoint library and selects the Approval Group from a drop down.
- When the flow triggers, a lookup is made against the approval group to get the First and Second stage approvers.
- A Custom Response Approval Action is launched to the First Approver, with the possible Outcomes built to include the Second Stage approvers. This results in the following possible Outcomes.
- Reject
- Approve – Send to Second Approver A
- Approve – Send to Second Approver B
- etc
- Wait for the first approval outcome.
- Create a second stage approval using the e-mail selected in the First Approval outcome
- Wait for the Second Stage approval
- Document status updated in SharePoint.
To show this approach in a working manner for this post, I’ve built the following:
- A SharePoint Document library with content approval and a single Lookup column to a configuration list containing the First and Second stage approvers.
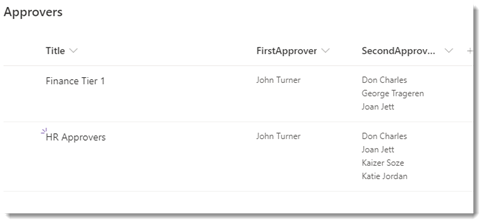
- A SharePoint list with the relevant First and Second Stage approvers with a useful Title field.
We could just as easily have used the users Line Manager and then make a business decision in the flow based on the Line Managers department from their profile (with of course a catch all option for when AD doesn’t have the information!), but I wanted to keep this simpler for now to show the mechanism in action.
Building the flow
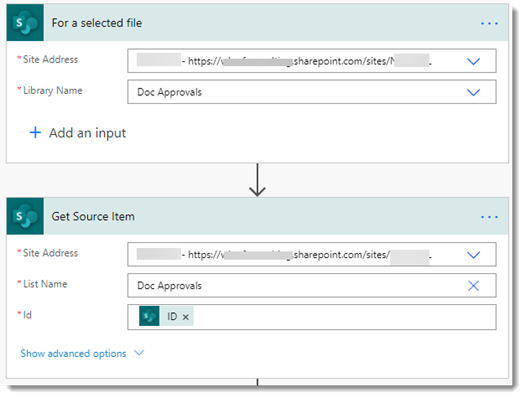
We start with a simple Selected File trigger, This allows the user to select a file and then use the context menu to submit the file for approval.
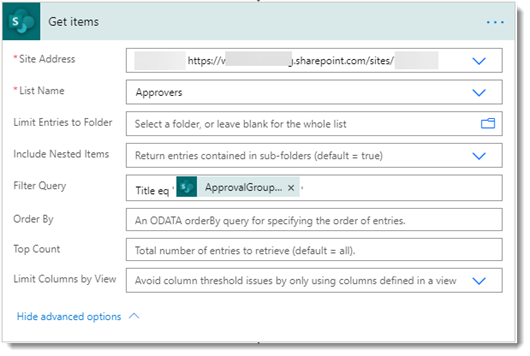
Immediately after, we pick up the selected item using a Get Item action. This gives us access to the file path and other useful info later. The next step then uses a Get Items action to select the correct Approver group from the configuration file list.
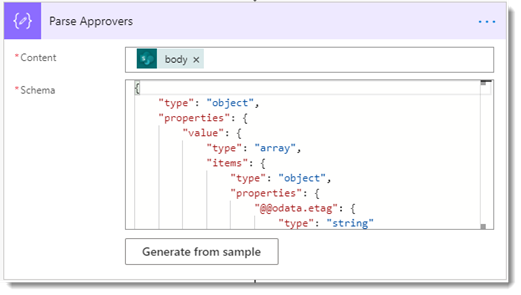
The filter query uses the Title from the lookup field in the source Item to filter the configuration list result. Watch the ‘’ around the dynamic data! (In our sample data above, the Title should equal “Finance Tier 1” or the other group name value. Once we have that item, we just need to parse it using a Parse JSON action to make it useful.
I usually build the schema for these from a first run of the Get Items action, using the Generate from Sample option. It does sometimes however provide a very rigid schema that may not meet your needs as this one didn’t. I had to remove a number of data types and required fields from the schema to make it work every time.
If you find yourself playing with JSON much, I heartily recommend reading John Liu’s post “A thesis on the Parse JSON action in Microsoft Flow” where he dives deeply into the issue with this action and it’s schema.
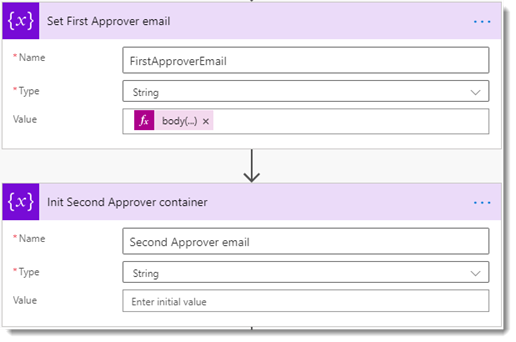
Next up is a couple of Initialize Variable actions, the first to immediately set the First Approver e-mail using the Expression
body(‘Parse_Approvers’)[‘value’][0][‘FirstApprover’][‘Email’]
This takes the output of our Parse JSON method, extracts the first item in the Value collection returned (we know we’re only pulling back one item!) and then gets the value of the First Approver email field and sets it as the string value of the variable. The second action just creates an empty container ready for us to use later in the flow.
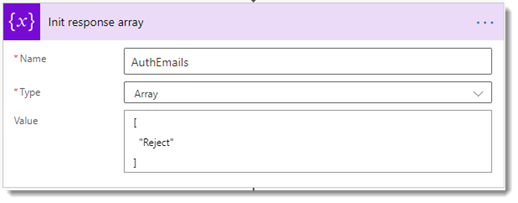
And then we need an Array to hold our Custom Responses to be passed into the Approvals process. At this point, we add in any ‘static’ options that we want included, in this case the Reject option.
The next step is where the dynamic approvers comes in. We’re going to process the Second Approvers field from the configuration item. This is a multi-select People field in SharePoint, allowing us to select a number of user accounts. The only caveat really is that their e-mail must be populated. So far for this demo I’ve tried with up to 3 people selected but I see no reason why this wouldn’t work for more, depending on how the App and E-mail handles the larger number of options (You’ll see this in a short while.)
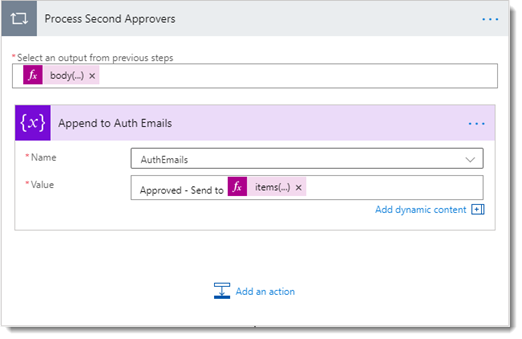
First we add an Apply to Each action and set the target of this to the following expression:
body(‘Parse_Approvers’)?[‘Value’][0][‘SecondApprovers’]
This addresses the first Item in the query to the config list (again, we know we’re only returning the one item, so this is safe.), we then get the Second Approvers collection. Then in an Append to Array action inside the apply to each, we use the following expression to pull out the e-mail of the Second Approver.
items(‘Process_Second_Approvers’)?[‘Email’]
This is then concatenated with the text “Approved – Send to “ to form the response object that we need.At this point, we know have everything that we need to trigger our first Approval process and wait for the outcome.
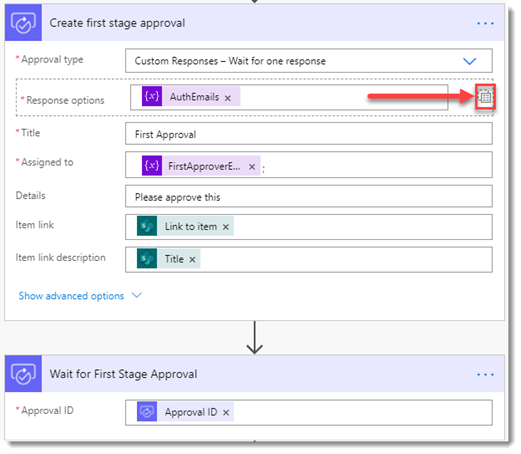
You’ll notice that I’ve switched the Response Options from individual items to a single block, this allows me to pass in the AuthEmails array that we created earlier. The rest of the information is straight forward, we pass the e-mail of the first approver, then a link to the item and it’s title. You can of course use the Details box to pass in more detailed content using Markdown.
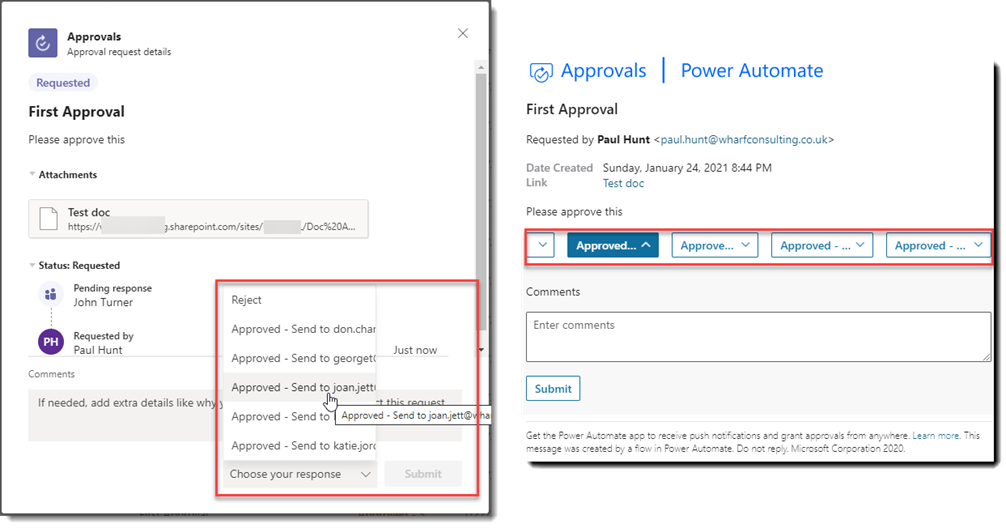
At this point, an approvals process is kicked off and the First Approver will receive a notification by e-mail and directly in Teams if you have the Approvals app installed (Which is well worth doing!). The dynamic responses we put into our response block show up as choices in a drop down on the Approval app and as individual drop downs in the e-mail. Sadly the e-mail does NOT work as I’d have liked for this. It would certainly be better as an individual drop down as per the app.
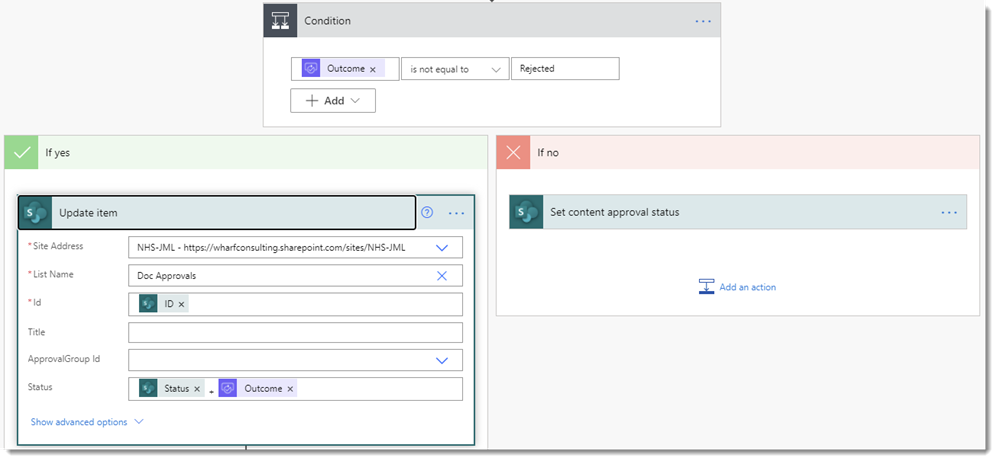
With those issue aside, the next step in the flow is to process the first approval, and this is a simple matter of checking to see if our outcome was a Rejection. If it was then we can do something with the result, such as set the content approval status in SharePoint and notify the requestor. If the approval is granted and sent to the next stage, then you may want to update a status field before moving on. I’m showing that using a multi-line text field and just appending a message onto it.
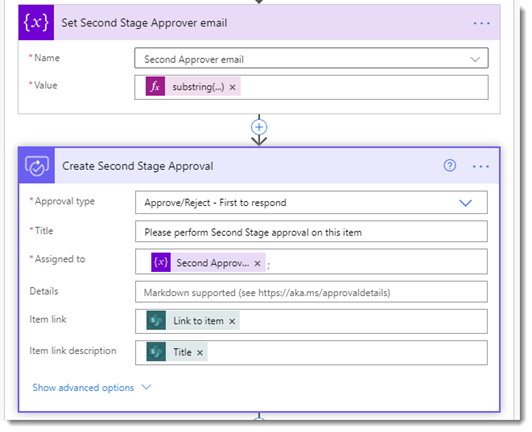
As we move down the approval route, the next step is to use a Set Variable action to update the empty Second Approver Email variable that we configured earlier. This is done using the Substring function to separate out the Second Approver e-mail from the Outcome text.
substring(outputs(‘Wait_for_First_Stage_Approval’)?[‘body/outcome’],19)
In this case, 19 is the number of characters that appears in the Outcome upto and including the space in front of the e-mail address, which we know is perfectly valid, because it came from a People picker field.
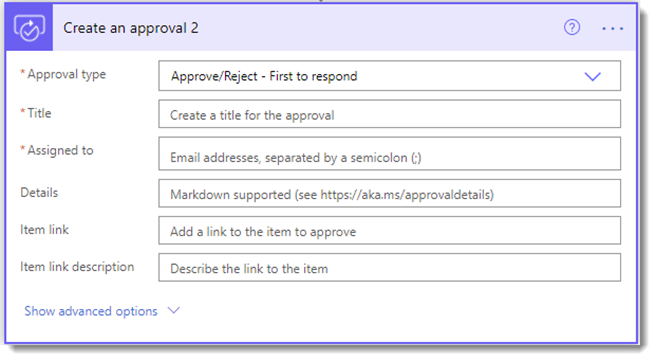
Then it’s back to the approvals process, this time with a simple Approve/Reject action, passing in the extracted Second Approver e-mail. Then we wait for the Approval action to complete and then take further action based on what the Second Approver chose. As we’ve covered off the point of this post with the dynamic approvals, I won’t dwell on the closure actions of this e-mail as you’ll have differing needs based on your scenarios.
In Summary
For me one of the gaping holes in the Flow no-code story, is the ability to capture information from an end user during a process using simple actions. I’d like to be able to not just ask for approval on an item, but also pass simple questions for additional info, maybe by passing a choice list in an action. Yes we can achieve this through Actionable Messages but these require premium connectors which the majority of my clients won’t have access to. I’d also like to see some consistency between the e-mails and the Approvals app. As you’ve seen in the example above, the E-mail options when combined with custom responses don’t present very well to the end user and I hope this is something that gets amended at some point (I’ll be raising this as a bug with the product group tonight!).
But overall, I was happy that we found a solution to the client’s need that didn’t require a premium license.

